 |
|||
 |
|
||||||||
|
|
|||||||||
NetStores E-Commerce ExtensionsConfiguring your storeOverview You will need to configure your store at NetStores so that your company logo and product images and pages are available to NetStores.
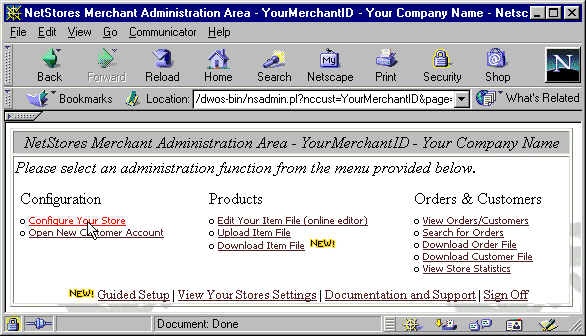
In Dreamweaver, in the NetStores-Store-Properties dialog box (image), enter your correct Merchant Id and Password and click Login. (If your NetStores-Store-Properties dialog box is not open, you can open it by choosing Commands > NetStores E-Commerce > Configure your site from the Dreamweaver menu bar.) Configuration at NetStores (top) In the NetStores Merchant Administration Area, under Configuration click Configure Your Store (see figure below). Access to the Merchant Administration Area requires a Merchant ID. If you do not yet have a Merchant ID, go back to Setup.  Logo (top) To unify the appearance of your pages and the shopping cart, search and quick form pages, NetStores displays your company logo at the top of the pages it generates. You need to upload your logo to the NetStores server for this purpose.
For more configuration options, click the ? next to Formatting Options. Setup to use product images and pages (top) NetStores needs product image and page URLs so it can make appropriate links on your shopping cart and search pages. You will provide the URLs in the item file you will make in a later step. To set up NetStores to use them properly, perform the following steps:
When you connect the item file in Dreamweaver, you give the NetStores objects, such as Add to Cart, the information they need about your products. For additional information, go to the online Dreamweaver extensions page at http://Dreamweaver.netstores.com/. Getting
Started / Installing / Setup / Item
File / Configure
Store / Connect
Item File / Copyright © 1999, 2000, 2001, 2002, 2003, 2004, 2005, 2006, 2007 , Fishbone Communications, Inc. - NetStores ® Last Modified 1-11-2013 |